

How to Master Network Enumeration in 5 Simple Steps
Network enumeration – this is the art of mapping out devices, services, and vulnerabilities on a network – is a fundamental cybersecurity skill. It’s how both ethical hackers and malicious actors learn about the layout and weak points of a target environment. In this blog post, we’ll break down network enumeration techniques into five simple steps. Whether you’re a penetration tester, a sysadmin, or an eager enthusiast, these steps will teach you how to effectively perform network scanning and enumeration. We’ll cover everything from passive reconnaissance to active scanning, using plenty of examples with popular network security tools. By the end, you’ll not only know how attackers map out networks (the penetration testing enumeration phase) but also how to use the same tactics to secure your network against hackers.
Before we move on, remember that enumeration comes in two types: passive vs active network enumeration. Passive methods gather information without touching the target (so they’re stealthy), while active methods involve direct scanning, sending probes to the target, and can be more easily detected. Both are important. With that in mind, let’s start with some network footprinting basics and gradually ramp up to full active scanning. Grab your toolkit – tools like Nmap, fping, smbclient, WhatWeb, and others will be our companions – and let’s get started!
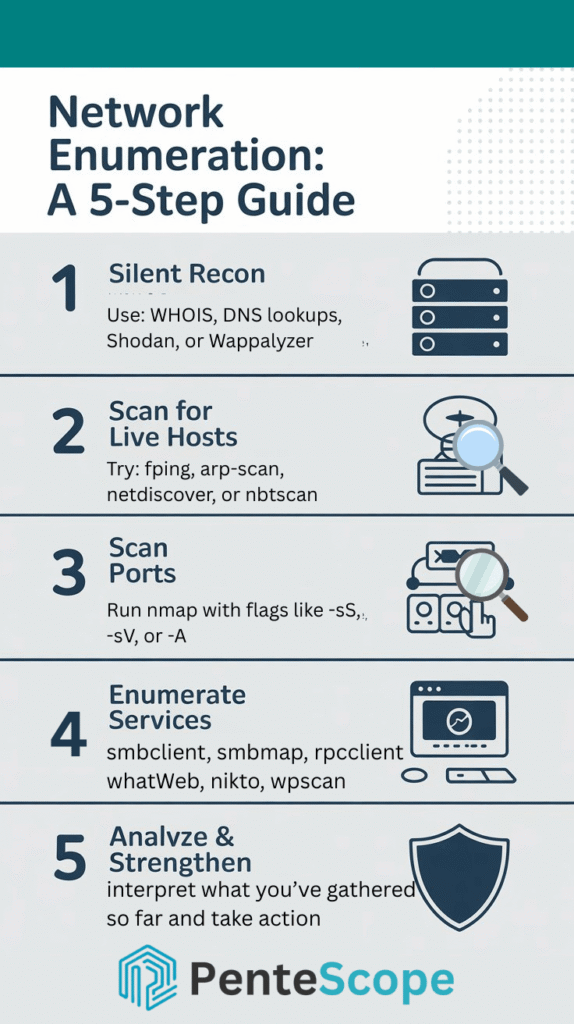
Want a practical way to map out and understand your target network like a pro? Follow these five straightforward steps — from silent recon to enumeration of specific services — using trusted tools and real-world techniques. Whether you’re just learning or refining your skills, this guide walks you through the essentials of effective network enumeration.
- Start with Silent Recon (Passive Footprinting)
Begin by quietly gathering as much information as you can about the target, without making noise — this is called passive reconnaissance.
👉 Use tools like WHOIS, DNS lookups, Shodan, or Wappalyzer to know about the target’s
domains, IP ranges, and technologies — all without touching the target directly. - Scan for Live Hosts on the Network
Once you know your scope, the next step is to find which systems are actually up — this is host discovery.
👉 Tryfping,arp-scan,netdiscover, ornbtscanto sweep the network and identify which IP addresses are active and reachable - Scan Ports and Identify Services
Now that you’ve found your targets, use tools like Nmap or Masscan to check which ports are open and what services are running.
👉 Runnmapwith flags like-sS,-sV, or-Ato map out exposed services on live hosts. For faster scans across huge ranges, use Masscan with rate limits. - Enumerate Specific Services
At this stage, we examine the specific services found during port scans to reveal details or weaknesses, especially web servers and SMB shares.
👉 Usesmbclient,smbmap, orrpcclientfor Windows shares, and tools likewhatWeb,nikto, orwpscanto fingerprint web apps and uncover misconfigurations. - Analyze and Strengthen
Finally, interpret what you’ve gathered so far and take action — either by exploiting the findings (ethically) or securing the weaknesses.
👉 Match each discovery with potential risks, patch known vulnerabilities, close unnecessary ports, and document everything for remediation or your final report.
Step 1: Passive Reconnaissance (Network Footprinting Basics)
Every good network recon starts quietly. In this first step, we gather as much information as possible without alerting anyone. This is passive reconnaissance – essentially network footprinting basics. The idea is to map out the target’s network range, domain information, and even technologies used, all without sending direct probes that might tip off the target.
Some tasks in passive enumeration include:
- Gather Public Information: Use WHOIS lookups to find domain registrant details and IP ranges. Check DNS records (e.g. with
nslookupor online DNS tools) to learn about subdomains, mail servers, etc. Even a quick Google search of the organization can reveal network info or past incidents. - Leverage OSINT: Open-Source Intelligence can provide a wealth of data. For example, search for the company’s name on leak databases, or find network ranges via public data. Websites like Shodan can sometimes show what services a company exposes to the internet (though querying Shodan directly is active on Shodan’s end, it’s passive from your perspective).
- Listen on the Network (if internal): If you have access to the network (say you’re an internal auditor), you can passively listen to traffic. Using a tool like Wireshark in promiscuous mode allows you to observe broadcast traffic, ARP requests, or services announcing themselves. This can reveal active IP addresses, hostnames, and more without you actively scanning anything.
Why start with passive recon? Because it’s safe and silent. For example, checking DNS and registry info or using a browser plugin like Wappalyzer to identify a website’s technologies doesn’t touch the target network at all – it uses publicly available data or the normal browsing traffic. (Wappalyzer is a cross-platform utility that uncovers the technologies used on websites.) By the end of Step 1, you should have an idea of your target’s IP addresses or domain, and maybe a guess of what systems or software are in play. Now you’re ready to move into active scanning.
Transition: You’ve gathered some intel without making a sound. Next, we’ll start interacting with the network directly to find live hosts – time to make some (controlled) noise.
Step 2: Active Host Discovery – Finding Live Systems
Now begins active enumeration. Step 2 is all about discovering which devices are actually online and reachable. In other words, we need to find the live hosts in the target network range. Think of this as a classic “ping sweep” or ARP scan. This is a critical step, because you can’t scan ports or services on a host if you don’t even know it’s there!
There are many network recon tools that can help with host discovery. Here are a few popular ones and how they work:
- ping – The most basic tool for checking whether a host is online. It sends ICMP echo requests to a specified IP address and waits for a response. For example:
ping 192.168.1.1While useful for single-host checks, it’s inefficient for scanning entire networks and can be blocked by firewalls. - fping – A high-performance ping tool that can sweep entire subnets quickly. Instead of typing
pingone IP at a time, you can askfpingto ping a whole range. For example,fping -a -g 192.168.1.0/24will send ICMP echo requests to every address from192.168.1.0 to 192.168.1.255and output a list of hosts that replied (i.e., are alive). This is an efficient way to perform network scanning for live hosts. - arp-scan – Great for local network discovery. It sends ARP requests (Address Resolution Protocol) on the local LAN to identify active devices. Since ARP is a link-layer protocol, this works even if ICMP (ping) is blocked by a host’s firewall. A simple usage is
arp-scan -lwhich scans the local network for responding ARP replies. If you’re on the same subnet as the target machines, arp-scan will quickly enumerate them. - netdiscover – Another ARP-based tool that can either actively scan or passively listen for ARP traffic. Netdiscover is useful in environments like Wi-Fi networks where devices broadcast ARP requests frequently. Running
netdiscover -r 10.0.0.0/24will actively sweep the10.0.0.0/24range for live hosts. It also reports MAC addresses and vendor info, which helps identify device types on the network. - nbtscan – Targets Windows networks by scanning for NetBIOS name service (NBT) information. Windows machines on a LAN often respond to NetBIOS queries on UDP port 137. Using
nbtscan <IP-range>can list hostnames of Windows PCs, their MAC addresses, and logged-in users. For example,nbtscan -v 192.168.1.0/24might show you that 192.168.1.45 is a host named FILESERVER in workgroup OFFICE. This is especially handy when ICMP is blocked but Windows is still chatting on NetBIOS.
Using these tools for network enumeration in host discovery will quickly give you a list of active IPs and some clues about what they are. A pro tip: try multiple methods. If a host doesn’t answer pings (ICMP), it might still show up in an ARP scan or respond to an NBTSCan query. By cross-referencing results, you won’t miss any systems.
After this step, you should have a map of live hosts. For penetration testers, this is like lighting up the map of targets. For defenders, you might compare this list to an inventory of authorized devices – any unknown IP could be a rogue device. Now, let’s go on to scanning those hosts for open doors!
Transition: We’ve identified our targets. Next, let’s knock on their doors (ports) to see what services might be running and waiting behind them.
Step 3: Port Scanning – Mapping Open Ports and Services (Nmap Tutorial)
With live hosts identified, we proceed to scan them for open ports – essentially asking “which doors are open, and what’s behind them?” This is where Nmap shines. Nmap (Network Mapper) is the go-to tool for port scanning and basic service enumeration. It’s often referred to as the Swiss Army knife of scanning, and for good reason. In this step, we’ll do a quick Nmap scanning tutorial to illustrate how to use it effectively, and we’ll also mention the ultra-fast masscan for special cases.
Using Nmap: At its core, Nmap sends probe packets (TCP SYNs, TCP connects, UDP packets, etc.) to specified ports on the target hosts and listens for responses to determine port state. A simple example to scan the most common 1000 TCP ports on a host might be:
nmap 192.168.1.45
This will report which ports are open (and possibly the service names for well-known port numbers). However, Nmap can do far more:
- Service and Version Detection: Add
-sVto have Nmap communicate with open ports to detect what service and version is running. For example, it might tell you that port 80 is running “Apache httpd 2.4.41” rather than just “HTTP”. - Operating System Fingerprinting: Add
-Oand Nmap will try to guess the OS of the target by analyzing network responses (TCP/IP stack behavior). - Default Scripts: Add
-sC(or-Afor aggressive, which includes -sV -O and some defaults) to run Nmap’s default NSE (Nmap Scripting Engine) scripts against services. These can quickly pull extra info like SMB share listings, SSH server keys, etc. - Specific Ports or Ranges: Use
-pto specify ports.-p-scans all 65,535 TCP ports, whereas-p 80,443,8080would scan only those three ports, and-p 1-1024scans 1 through 1024. You can mix and match as needed. - Output options: Nmap can output to files (text or XML) using
-oNor-oX, and even all formats at once with-oA. This is useful for saving results for later analysis.
In practice, it is advisable to use “nmap -h” command to view all the options available to you, but below are the most common Nmap commands for thorough enumeration on a single host:
nmap -sV -sC -O -p- 192.168.1.45For Aggressive and Faster Full Enumeration, Use Thus:
nmap -T4 -A -p- 192.168.1.45
The first one does a full TCP port scan on the host, tries to detect services, runs default scripts, and guesses the OS. It’s slower, but as a one-stop enumeration, it’s very informative. (Consider using -Pn if the host doesn’t respond to ping, to tell Nmap to skip ping check and scan anyway.)
The second command is ideal when you need a quick, all-inclusive scan that covers a lot in a short time, particularly in these situations: Time-sensitive assessments, Red team/internal testing, Less concern for stealth because it is more likely to trigger firewalls/IDS due to its aggressive nature (T4), and One-liner convenience.
Masscan for large ranges: If you need to scan many hosts or an entire large network very quickly, Nmap might be too slow. masscan is a specialized tool for that scenario. Masscan is essentially a network scanning beast optimized for speed – it claims to be able to scan the entire Internet in under 5 minutes by sending 10 million packets per secondthechief.io. That’s not an exaggeration: the author of masscan notes it can scan the whole IPv4 space in about 6 minutes at full throttlethechief.io. Practically, you might use masscan to scan a huge range for a specific port or a few ports, then use Nmap on the narrower results. For example, scanning your 10.0.0.0/8 internal network for port 22 (SSH) with masscan could quickly show all SSH servers, which you can then feed into Nmap for detailed version info. Keep in mind that Masscan is very aggressive by default, so always set a rate limit (e.g., --rate 10000 for 10k packets per second) to avoid flooding networks unintentionally. Masscan’s output is similar to Nmap and can even be imported by Nmap (-iL option) to easily chain the two tools.
By the end of Step 3, you should have a list of open ports on each live host and likely some initial info on what services are running. For instance, you might know Host A has ports 80 and 443 open (probably a web server), Host B has 445 open (Windows SMB file sharing), and so on. This is your network’s footprint of services. Next, we’ll take each interesting service and dig deeper with specialized enumeration tools.
Transition: We’ve mapped out the open doors. Now it’s time to peek inside and gather details about the services behind those doors, using service-specific enumeration tools.
Step 4: Service Enumeration – Digging Deeper into Services and Vulnerabilities
Port scanning gave us the where (which host, which port). Now we want the what and version, and maybe even the how to exploit. In Step 4, we enumerate specific services in depth. This often requires specialized tools tailored to the service (for example, web servers vs. SMB file shares require different approaches). We’ll cover two common categories: SMB (Windows network shares) and Web services, since those are frequently encountered and are areas where many great tools exist. Of course, enumeration can apply to any service (databases, SNMP, etc.), but we’ll focus on the ones in our tool list.
SMB Enumeration (Windows File Shares): If your scan found open ports 445 or 139 on a host, that means SMB (Server Message Block) is available – the protocol Windows uses for file and printer sharing (also used by Samba on Linux). Enumerating SMB can reveal shared folders, user accounts, and more.
- A straightforward approach is to use
smbclient, which is like an FTP client for SMB shares. Simply listing shares is a good start:smbclient -L //<IP> -Nwill list all available share names on the target without any login (the-Nmeans no password). This is useful to see if the server has any guest-accessible shares or misconfigurations. If you have credentials, you can provide-U user%passto smbclient to access protected shares. - For a broader look, smbmap is a fantastic tool. It allows you to enumerate shares across a domain or multiple hosts easily. Running
smbmap -H <IP>will list the shares on that host and their permissions (read/write). This quickly tells you, for example, that on FILESERVER there’s a share called “Public” that is readable by everyone. You can use smbmap to attempt to read files from shares, too, or to try a list of common credentials across many machines. - rpcclient digs even deeper by using Windows RPC calls over SMB. With rpcclient, you can query user accounts, groups, and other info from a Windows machine. For instance, you might start with an anonymous connection:
rpcclient -U "" -N <IP>(empty user, no password). If it connects, you have a null session and can runrpcclientcommands likeenumdomusersto list user accounts on the system or domain. This can reveal usernames, which are valuable for further attacks (password guessing, etc.). Rpcclient can also enumerate groups, policies, and more if the target isn’t locked down. - A newer all-in-one tool worth mentioning is NetExec, which uses the command “
nxc” or “netexec”. It was formerly known as CrackMapExec (CME). NetExec is extremely versatile– it can sweep the network, enumerate SMB shares and users, and even attempt common passwords, all in one go. For example, with a singlenxc smb 10.0.0.0/24command, you could identify all hosts with SMB, list their shares, and even see which ones allow guest access. It’s a favorite for many penetration testers to automate Windows network enumeration and even exploitation (like executing commands via SMB sessions), but it requires caution to use (you don’t want to run exploits when you only mean to enumerate accidentally!).
In short, SMB enumeration might expose open shares with sensitive data or lax permissions, and user account information. It’s gold for attackers – and thus defenders should regularly check what an anonymous user can see on their SMB servers and tighten those permissions.
Web Enumeration (Web Services): Nearly every network has some web service running – maybe an internal website, an API, or a router login page. When ports 80, 443, 8080, etc. are open, you’ll want to enumerate them to discover what’s running. This usually starts with fingerprinting the web technology and then scanning for known vulnerabilities.
- Tools like WhatWeb and Wappalyzer are great for fingerprinting. WhatWeb is a command-line tool that scans a target URL and identifies technologies used by the site (server software, CMS, frameworks, programming languages, JavaScript libraries, etc.). Wappalyzer is similar but often used as a browser extension – it reveals the tech stack of a site (for example, it might show that a site is running WordPress with a certain theme, on Apache, using Google Analytics). Using these tools, you can quickly get details like “Target is running Apache 2.4.18 on Ubuntu, and the web app is built with PHP Laravel” – all of which are clues for potential vulnerabilities.
- Armed with web stack knowledge, you can proceed to vulnerability scanning and enumeration for web apps. A classic tool here is Nikto – an open-source web server scanner. Nikto will check a web server for thousands of known issues: outdated software versions, default files, config problems, and so on. It’s as easy as
nikto -h http://<IP>. While it produces a lot of output (and some false positives), it can quickly highlight “low-hanging fruit” like open directories or dangerous scripts. In fact, Nikto is known to scan for over 6700 potentially dangerous files/CGIs and other problems. Think of it as a web-focused vulnerability assessment tool. - Manual Enumeration & OpenSSL: Not all web enumeration is via specialized tools. Sometimes, just connecting to the service and observing can yield info. For example, you might use
openssl s_client -connect <IP>:443to manually retrieve the SSL certificate and check the supported protocols on an HTTPS service. This could show you the domain name in the certificate (maybe revealing other hostnames), or that the server only supports an outdated TLS version – an issue to note. Similarly, simply browsing the site and viewing page source or default pages can reveal if it’s, say, an Apache Tomcat manager interface (which you could then try default creds on), etc. There are also browser tools, like built-in dev tools or extensions, that complement this step. Additionally, WhatWeb itself can perform some vulnerability checks with its plugins, and other tools like WhatWeb and Wappalyzer have online services for quick checks.
This process of service enumeration can be repeated for other services too: for example, if you found an open FTP port, you’d try an FTP client or specialized tool to enumerate accessible directories; for an SNMP port, you’d use an SNMP walker tool to dump info; for LDAP, maybe ldapsearch; and so on. The general idea is: use a tool that “speaks” the service’s language to ask it what it can tell you. Often, misconfigured services will happily spill secrets.
By the end of Step 4, you should have detailed information about the network’s services: versions of software, list of shares, user accounts, web frameworks in use, etc. In a penetration test, this is the treasure trove of info that will inform which exploits to try or which weak passwords to attempt. In a defensive setting, this is also eye-opening – you might discover, for instance, that an old web server is exposing a directory of backups, or that a database service has an empty admin password.
Transition: Now that we’ve gathered all possible data about the network’s hosts and services, the final step is to analyze this information and take action – either exploiting the weaknesses (offensively) or fixing them (defensively).
Step 5: Analyze the Results and Strengthen Security
The last step to master network enumeration is actually interpreting and using the information you’ve collected. Enumeration isn’t just for show – it’s done to facilitate further action. This step is half about attacking (if you’re a pentester) and half about defending (if you’re securing the network). In either case, you should now perform a network vulnerability assessment using the data and plan next steps accordingly.
For a penetration tester or red teamer, now is the time to pivot from enumeration to exploitation. Review the findings:
- Did you find any outdated software with known exploits? (For example, an old Apache version or an SMB service vulnerable to EternalBlue). Those become prime targets.
- Did you enumerate user accounts on a system or the network? You might use that for password spraying or brute force attacks next.
- Are there any misconfigurations? Perhaps an SMB share “Everyone” can write to – that could allow malware upload, or an FTP server that allows anonymous login.
- In short, you map each piece of info to a potential vulnerability or attack path.
For a network defender or blue teamer, you use the enumeration output to patch holes:
- Treat it like an audit. Every open port and service you discovered should be accounted for – if something is running that shouldn’t be, shut it down. If default credentials or anonymous access are allowed (as you saw in enumeration), fix those immediately.
- Look at the software versions revealed. Are they up to date? If not, plan to update or mitigate. For instance, if WhatWeb revealed a WordPress site, ensure it’s updated and not running vulnerable plugins; if rpcclient showed that null sessions are allowed on a Windows server, adjust the registry/Group Policy to disable that (so anonymous users can’t list out user accounts so easily).
- Essentially, you’re doing a network vulnerability assessment: identifying weaknesses and then rectifying them before attackers exploit them. This might involve patching systems, tightening firewall rules (e.g., closing ports that don’t need to be public), or improving configurations (disabling SMBv1, enforcing strong passwords, etc.).
It’s often said that enumeration is the key to exploitation. From the offensive side, this is absolutely true – the info gathered is what makes targeted attacks possible (otherwise, attackers are just blindly fumbling). But from the defensive side, we flip that around: enumeration is also key to understanding your own network’s weaknesses. By performing these steps proactively, you effectively simulate what an attacker would find. This allows you to shore up defenses in those exact areas. In practice, organizations should regularly conduct such scans and audits as part of their security program.
Finally, whether you’re pen testing or securing, document your findings. Create a network map, list the systems and what’s running on them, and note the vulnerabilities or misconfigurations discovered. This documentation is invaluable for remediation and for future tests (to compare if things improved or if new issues arose).
Conclusion
The five clear, actionable steps can simplify the overwhelming task of mastering network enumeration. We have discussed the five steps in detail, starting with silent reconnaissance to gather information, discovering live hosts, scanning for open ports and services, enumerating specific services, and the last step, which is result analysis for further action depending on the side of the divide you are operating from—red team or blue team.
This structured process will enable better control and insight over a network’s assets and vulnerabilities. Skipping a step could leave gaps, but working through each ensures a comprehensive understanding of what’s exposed and needs fixing.
It is indeed a lot, especially in the beginning, but with practice, repetition makes it easier. Mastering these tools and manipulating the commands on a Kali Linux—fping, arp-scan, netdiscover, masscan, nmap, smbclient, submap, rpcclient, whatweb, wappalyzer, nxc, nikto, and OpenSSL —will be of great assistance. To practice what you have learned, try them in a lab or on a test network.
Happy enumerating, and stay safe out there! Remember, network enumeration is not just an attacker’s toolset but also a defender’s best friend. Secure networks start with knowing what’s on them.
Call to Action
We encourage you to join our community through our monthly newsletter and follow our Facebook, X, and Pinterest channels for more information and updates on cybersecurity issues and general practices. Our blog contains relevant materials that allow you to safeguard yourself against constant threat changes.
Check the About Us page to learn who we are and what we do. Our contact page allows you to reach out to us with any concerns you may have. Further, you can review our services to ascertain how we can help boost your security posture.
Don’t know what to do first? Every post has its own set of FAQs tailored to the topic discussed. Our main FAQs page answers some common queries regarding our services, how we work, and what to expect.
Frequently Asked Questions
What is network enumeration in cybersecurity?
Network enumeration describes the discovery of devices, services, users, and vulnerabilities present in a given network. It adds to security professionals’ understanding of the network’s topology and can help identify potential areas of attack or allow for probing.
What are the main types of network enumeration?
How does Nmap help with network scanning?
Is network enumeration legal?
What measures can I take against enumeration attacks while securing my network?


